2) Holidays can be edited from the main schedules page rather than having to first click on a time window.
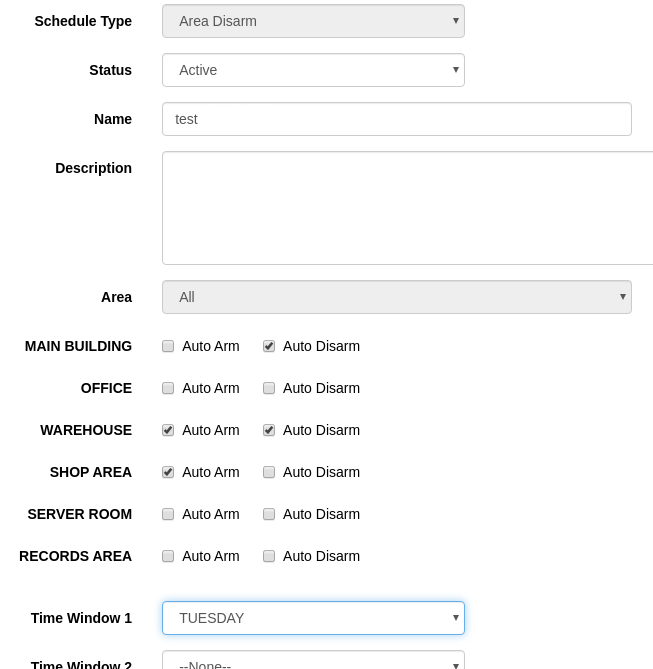
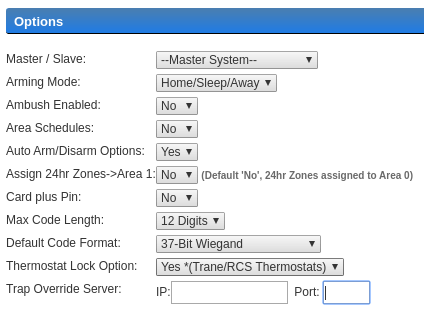
3) DMP area schedules can now allow auto arming and disarming to be enabled or disabled. We wanted to ensure that you approve of giving the customer the authority to enable auto arming or disarming and so there is a per device option to enable this feature to show up for your customer. The option is present for XR 150, 350, or 550 panels only. To enable from the Dealer Site, Go to the Customer->Device->General, scroll down under Options, set Auto Arm/Disarm Options to Yes, click Save Changes.
After performing those steps, the options to enable/disable auto arm/disarm will show on the Customer Site from the Area Schedule page. If the DMP progamming option of area schedules is turned on then only the auto arm/disarm option for the matching area will be shown in the area schedule. If area schedules is turned off then all areas will be shown for auto arm/disarm in the same area schedule.
We chose to show the options under the schedule since then it confirms there is a schedule prior to setting the option. Also, if enabling auto-arm there is a warning window presented so they understand how the time windows will affect the operation. If auto arm or disarm is enabled then they will not be able to delete the schedule.
Your customer can configure an automatic task rule to send out an email reminder to re-enable the auto arm/disarm at some point in the future. There is also a helpful "Tip" message shown to the user if they are changing the current auto arm/disarm option to make them aware of this reminder option.